Tanya Andrews Physiotherapy
Postural Control Ball Exercises
Postural Control Ball Exercises
Below you will find a small selection of ball exercises.
Size of Ball
To find the correct size of ball for the purpose of exercise the general guide lines are:
Height. Ball Size.
5’-5’7” 55cm
5’8”-6’-2” 65cm
6’3”-6’9” 75cm
Over 6’10” 85cm
Once inflated the ball should match its size in height, to test it is correctly inflated you should be able to push into the ball 1”-2” with your index finger.
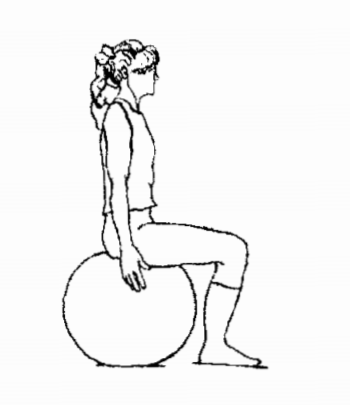
When sitting on the ball your thighs should be parallel to the floor with your knees at right angles and feet flat on the floor. Now we are ready to go……
The first skill to acquire is sitting on the ball with the weight evenly distributed through your feet and sitting bones, with a good spinal posture and head erect.
1.
Sit on the ball with a start position as described above. Maintaining your balance slowly lift one foot off the floor, place it back to the start position and lift the alternate foot. To begin with you may need to have your hands on the ball, as your balance improves , take your hands off the ball. progress by folding your arms across your chest, finally have your arms above your head. You can also challenge yourself by bringing your thigh towards your chest, but do not let your pelvis drop back “sag”.
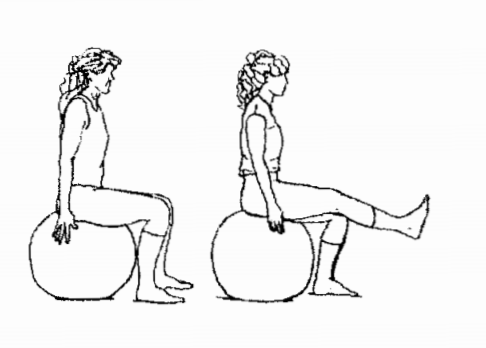
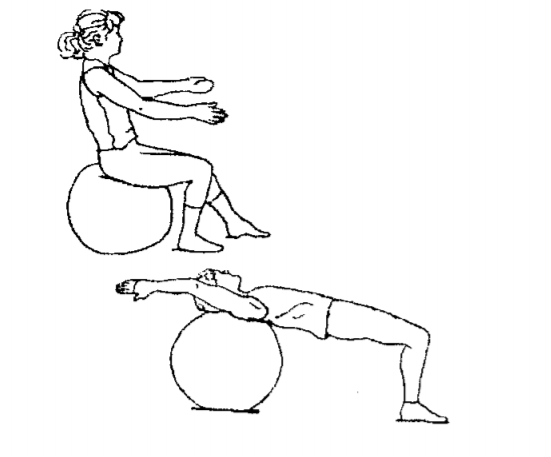
2.
Start position sitting as previously described. Maintaining an upright posture with your weight evenly distributed through both sitting bones and pelvis in neutral, Active the abdominal muscles and alternatively lift foot off floor and straighten the knee. As control is achieved progress by straightening opposite arm towards the ceiling.
3.
Start in sitting position. Sit upright, feet flat on the floor, without moving your feet, engage your pelvic floor and abdominal muscles, tuck your sitting bones into the ball and tilt your pelvis forward and back to start position. Now tilt your pelvis left and right (lateral pelvic tilt) keeping head shoulders and feet still. Finally perform pelvic circles, by combining the above movements to make clockwise and anticlockwise circles.


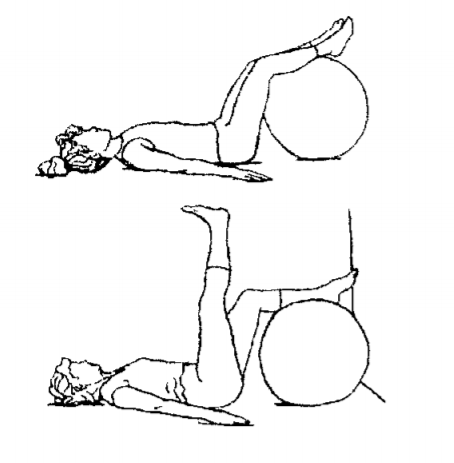
4.
Lying on your back, place your calves on the ball with your ankles supported. Arms on the floor, away from your body, palms facing the ceiling. Squeeze your buttocks and roll your hips off the floor, do not over arch the lower back only go to a neutral spine position. To advance this exercise, bring your arms closer to your side. Move the ball towards your heels. Cross your arms on your chest. Lift your ams straight up at shoulder level towards the ceiling.
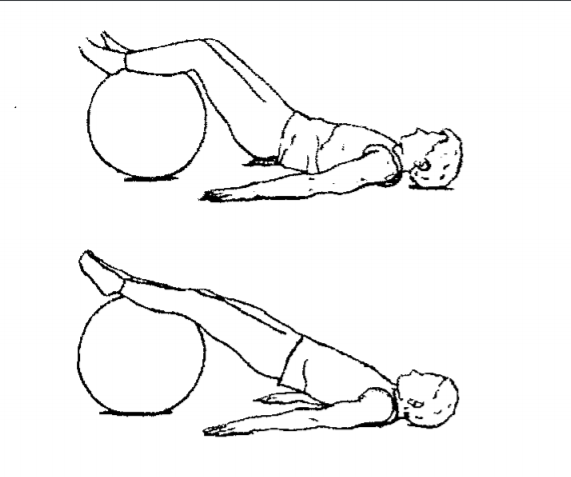
5.
Lying on your back, with your calves supported on the ball. Keeping one leg on the ball, pull the ball towards your thigh, Straighten the knee of the other leg to take leg towards ceiling and stretch your hamstrings.
6.
Seated roll down, start in the seated position, slowly walk your feet out whilst keeping your head in mid line, engage your abdominal muscles and tuck your pelvis as you continue to walk your feet out. Stop walking out when your head and shoulders are supported on the ball, your knees should be bent to 90 degrees and your body parallel with the floor. To return to the start position, walk slowly in reverse, allow you buttocks to drop a little as you tuck your chin and your pelvis, keep walking until you return to your seated start position.
This is a good exercise in itself and needs practise. Once you have mastered it, you then use the position for a number of other exercises.
7.
Start by kneeling in front of the ball, lie over the ball by placing your chest on it, now put your hands on the floor, shoulder width apart in front of the ball. your thighs and torso should be in contact with the ball.
Start by gently squeezing your buttock/Gluteal muscles stretch out and lift one leg, return to start position. Do not allow your back to arch or twist your pelvis in an effort to lift the leg higher. Repeat with the other leg. Now stretch out and lift one arm, keeping the body still and the abdominals engaged. Repeat with the other arm. Finally left an alternate leg and opposite arm, keeping control of the body position throughout.
CAUTION WITH THE BELOW EXERCISE, EXTREME CONTROL IS REQUIRED:
For a real challenge work towards superman, Lifting and maintaining control whilst both legs and arms off the floor.
8.
Kneeling on the floor, place your hands on the nearest point of the ball. Gradually lean forward rolling the ball away from your body. until there is a straight line from shoulder to hips, your forearms will now be supported on the ball. Do not let the back arch as you work by further straightening your body to have a straight line from back of head to knees. Only push out as far as you are able to maintain a neutral spinal position.
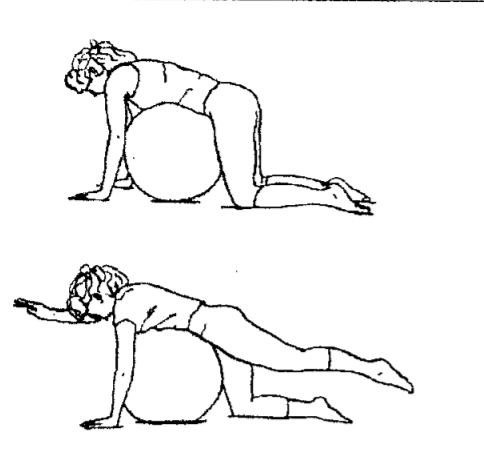
9.
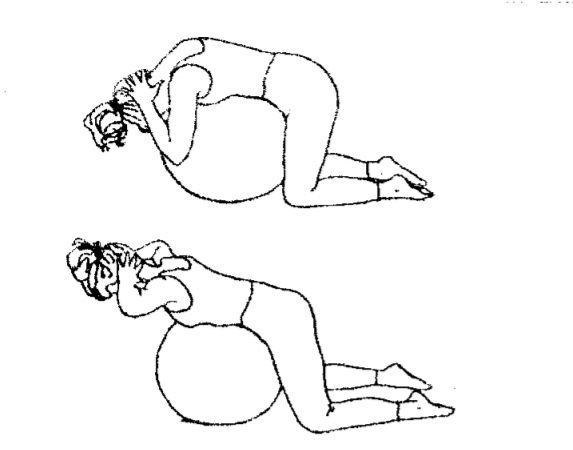
Kneeling in front of the ball, place your chest on the ball. Keeping your lower back still and in neutral, with your shoulder done and your hands lightly placed on the back of your head, gently tuck your chin, and push forward and up with your breast bone/Sternum to extend your upper back. Feel the work at the bottom of your shoulder blades. Avoid lifting your head to the ceiling. Lower back down slowly.
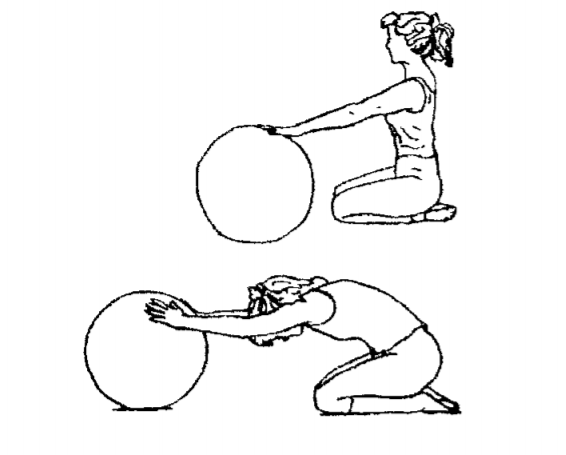
10.
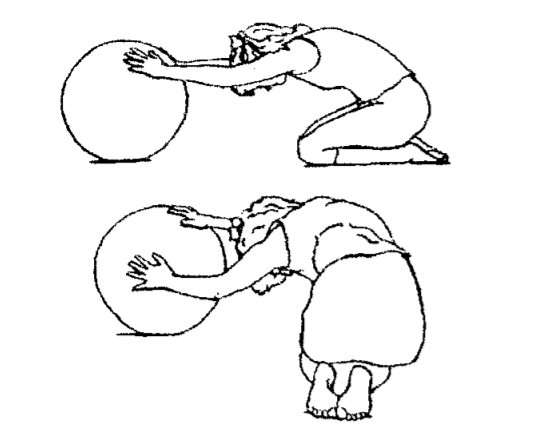
Kneeling in front of the ball, place your hands on the ball, shoulder width apart and with your elbows slightly bent. Sit back onto your heels, to feel a stretch under your shoulder and down either side of your torso. Slowly allow your arms to drop to one side keeping your head within your shoulders, you should feel a stretch along the same side of your body as the hand on top of the ball. Return to start position and then stretch to the other side.
11.
Start this exercise with the ball against a wall, and take up a kneeling press up position, keeping the lower back in neutral and working the abdominals, bend the elbows to lower the body towards the ball, return to start position.
To progress this exercise with feet on the floor assume press up position, then proceed as before by bending elbows and lowering and raising body from the ball. Further progression a) take ball away from wall b) bring feet closer together.
12.
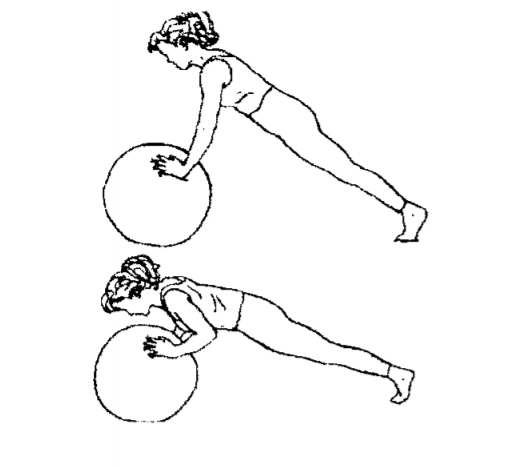
Kneel on the floor and place chest on the ball. Gradually walk hands forward until the ball is under the thighs. With your hands shoulder width apart and elbows straight but not locked. Ensure pelvis in neutral alignment, do not allow the back to hollow. Let the elbows bend and straighten within control to perform press up.
To progress this exercise walk out further, to have ball under shins.

13.
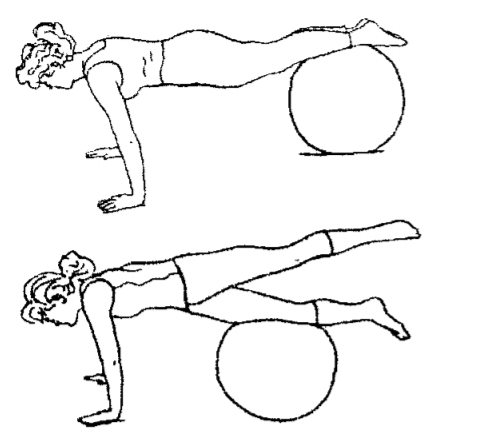
Kneel on the floor and place your chest on the ball. Gradually walk hands forward until the ball is under the shins. Hands shoulder width apart and elbow straight but not locked, ensure Pelvis in neutral. Lift one straight leg off the ball to extend the hip, Do not arch the lower back or twist the pelvis. Lower the leg and repeat with the other leg.
Alternative bend the knee and extend the hip, by lifting the leg with the sole of foot aimed towards ceiling. Repeat other leg.
With same start position perform Hamstring curls, by bending the knee to bring your hell towards your bottom, straighten the knee to return to start position, repeat with other leg.
14.
Kneel with the ball beside you, it helps to stabilse the feet against the wall in a walk position, as you lie sideways over the ball, the ball should be between your hip and your shoulder. Place the underneath hand on the ball. Stretch your top arm up and over your head in line with your ear, as you stretch over the ball. Return to start position and repeat. Perform the same exercise lying on your other side.
From the start position lying sideways over the ball you can perform lateral raises. Place your hands lightly on the back of your head, with the top elbow pointing at the ceiling, squeeze your shoulder blades down and back , gently tuck the chin and do not pull on your neck now slowly raise yourself up off the ball by bringing your top elbow towards your waist. Lower back to start position and repeat. Perform the same exercise lying on your other side.

15.
Stand with feet hip width apart, weight evenly distributed through both feet, knees straight but not locked, shoulders over hips and head erect. Hold the ball between your hands. Keep your weight evenly through your feet as you lift the ball up to end with head framed between your straight arms. Do not allow to pelvis to drop back or your chin to poke. Return slowly to tart position and repeat. From the start position straighten your arms, keeping shoulder blades down and back, whilst maintaining the posture of above, and keeping your pelvis facing forward carry the ball to left and right.

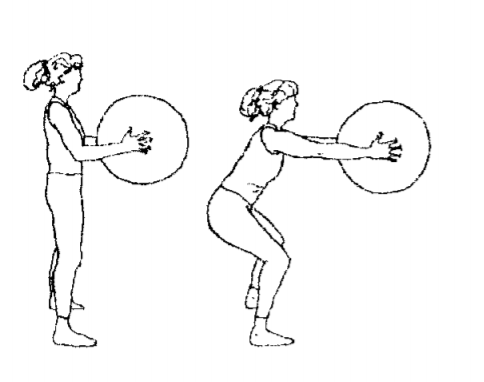
16.
Stand with feet hip width apart, weight evenly distributed between both feet, knees straight but not locked, shoulders over your hips and head erect. Hold the ball between your hands. Straighten the arms to hold the ball away from your body. Bend the hips and knees to squat making sure the knees are over the 2nd toe throughout. Keep good alignment of the spine, do not poke the chin.
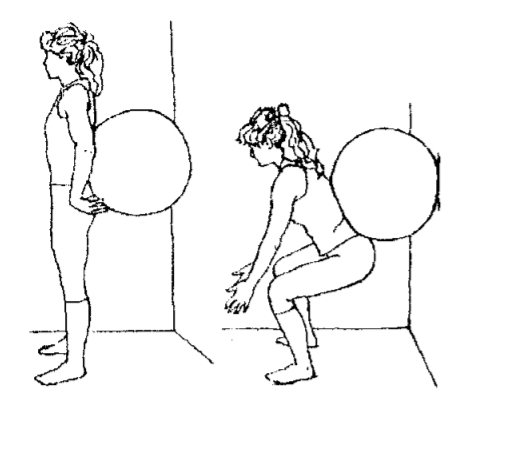
17.
Stand with your feet shoulder width apart, place the ball against the wall in the small of the back. with your feet approximately 6 inches in front of your body, find your spinal neutral. Bend your hips and knees to 90 degrees and return to start position, ensuring that the knees are aligned over the second throughout and the pelvis remains level.
Progress to single leg squat with the knee of the lifted leg held at 90, perform half squat, with working knee aligned over 2nd toe.